Friday, September 11, 2009

fastfood@home: Little Debbie Oatmeal Creme Pie

Little Debbie Oatmeal Creme Pie CopycatFor many, a Little Debbie Oatmeal Creme Pie brings back fond childhood memories of a soft cookie with a smooth cream filling. Not me though. I had my first one this year and I just learned what I’ve been missing. But not content just buying it from the store, I challenged myself to make it at home.

Turns out, making it at home is pretty easy with all the copycat recipes on the web. But if there’s such a thing as a healthy cookie, this recipe is definitely not one of them. The filling is what you’d expect. Sugar, shortening and even marshmallow creme. But it turns out to be a good representation of the creme in the Little Debbie cookies. Oatmeal Cookie Sandwich

The cookie definitely has more of an oatmeal cookie taste than the original Little Debbie. But this cookie can stand on its own. You don’t need the cream filling for this recipe to become one of your favorites for oatmeal cookies.

One thing to note is the cookies spread out quite a bit when cooking. I used a medium scoop with a quick release and spaced them further apart than a regular cookie recipe.

Printable Version
Ingredients

1 cup butter

3/4 cup dark brown sugar

1/2 cup sugar

1 tablespoon molasses

1 teaspoon vanilla

2 eggs

1 1/2 cups flour

1/2 teaspoon salt

1 teaspoon baking soda

1/8 teaspoon cinnamon

1 1/2 cups quick oats


Cream Filling

2 teaspoons very hot water

1/4 teaspoon salt

1 (7 ounce) jar marshmallow cream

1/2 cup shortening

1/3 cup powdered sugar

1/2 teaspoon vanilla


    Directions
    1. In large bowl, cream margarine, sugars, molasses, vanilla, and eggs.

    2. Combine flour, salt, baking soda, and cinnamon.

    3. Add to the creamed mixture; mix in the oats.

    4. Drop dough by Tbsp on ungreased sheets.

    5. Bake at 350°F.

    6. Bake for 10-12 minutes,or until just starting to brown around the edges.

    7. They will look moist; don't overcook.

    8. While the cookies bake prepare the filling.

    9. In small bowl, dissolve the salt in the hot water.

    10. Allow this to cool.

    11. Combine marshmallow cream, shortening, powdered sugar, and vanilla in med bowl; mix on hi until fluffy.

    12. Add the cooled salt water and mix well.

    13. Spread filling on flat side of one cookie, press 2nd cookie on top.

    Oatmeal Cookie 

    Read more!

    Wednesday, September 9, 2009

    Snails & Slugs Love Beer

    Snails PestsI have a feeling snails and slugs are going to be an issue next spring. The snails with shells are EVERYWHERE, but I haven’t seen them eating on anything yet. The slugs are the immediate problem. I’ve spotted them eating on my lettuce seedlings and roaming about in my compost bin. Luckily there’s a simple and safe solution to control these garden pests, and that’s with Beer!

    During the day you can see the slug slime trails glimmering in the sun, and they often lead to my raised garden bed. Growing up, my Mom used a shallow foil pie pan, added beer, and then the slugs would soon follow. For some reason they’re attracted to the beer. They get a whiff of it, climb in and drown. And by the looks of it, it’s more effective and safer than chemicals from the hardware store.

    slugs in beer Yes it’s gross. But it beats bite marks in your lettuce.

    Read more!

    Monday, September 7, 2009

    Fresh Watermelon Granita

    watermelon granitaI hope everyone is having a good Labor Day weekend. Whatever you’re doing this holiday, one thing that will be at the center of many picnics and get-togethers will be watermelon. A fresh slice on the unofficial end of summer sounds like it was meant to be. But you could turn it into a frozen treat.

    fresh watermelon granitaDuring my recent visit to the University of Minnesota’s kiwi orchard, I was able to buy a few things from the nearby Apple House, also run by the U of M. They had some great Minnesota Alderman plums, apples, and watermelon. I bought them all. Once I got home and cut open the watermelon, I realized it had been through some stress. The flesh had caverns and yellowish discoloration in the middle, but for the most part, it tasted OK. So I turned it into the next best thing, watermelon granita.

    This is an easy step into the world of frozen ices, sorbets and granitas. All you need is watermelon, lime juice and sugar. Many granita recipes call for a simple syrup, which is just water and sugar brought to a boil. This helps the granita hold its shape when scooped out of the freezer with an ice cream scoop. But if you don’t mind eating a snowy mound of frozen watermelon deliciousness, do it the easy way.

    granitaJPEG-1granita

    Printable Version
    Ingredients

    5 cups peeled and seeded watermelon chunks 

    1/2 cup plus 2 tablespoons sugar

    2 tablespoons fresh lime juice

    Directions

    Place the watermelon chunks, sugar and lime juice in a blender or food processor, replace the top, and blend on high speed until very smooth.

    Transfer the mixture to a 13x9 Pyrex baking dish and freeze for 30 minutes.

    Remove from the freezer and use a fork to scrape any ice crystals from the sides of the bowl. Stir to incorporate and return to the freezer.

    Repeat this scraping procedure every 30 minutes, or until the consistency is "snowy" when scraped with a fork or spoon, at least 4 hours. Then scoop into bowls or dessert glasses and serve.

    Read more!

    Friday, September 4, 2009

    Toasted Pine Nut Couscous

    Toasted Pine Nut Cous Cous   I’ve been on a major sugar rush for way too long. Between cheesecakes and midnight snacks, I haven’t had the time to make healthier meals. I suppose cheesecake doesn’t count as a good lunch.

    Raw Pine Nuts

    Couscous has to be one of the easiest dishes out there. Once the water reaches boiling, you add the couscous, cover the pot with a lid, shut off the heat, and in 5 minutes it’s ready to serve. Talk about easy. Couscous is basically small granules of semolina wheat that soak up all the great liquid you add to your pot. That’s why recommend broth as opposed to water, for some extra flavor.

    I saw some pine nuts at the store and decided to buy them for my parrot, but my recipe testing ideas won out (although she did get some leftovers.) Pine nuts have a great flavor, with just a slight zing of pine. Most pine nuts come from the cones of the stone pine, and the ones in the grocery store are luckily, already shelled. They can be used in savory dishes like couscous, but are also great in cookies, breads, etc.

    Toasted Pine NutsI first toasted the pine nuts until they got some nice color and set them aside. They offer a nice texture to the couscous along with the sun-dried tomatoes.

    You can usually find sun-dried tomatoes in the produce section but I always end up looking real hard just to find them. It’s rare they’ll be on a top shelf for all to see.

    In this recipe I added an additional 1/4 cup water/broth, because the couscous soaked up the liquid until it was a little too dry. Couscous shouldn’t be runny or dry, but should have some good moistness.

    Toasted Pine Nut Couscous

    Printable Version
    Ingredients

    1/4  cup  pine nuts

    2 1/2  cups  reduced-sodium chicken broth or water

    1/2  cup  small, chopped sun-dried tomatoes (not oil-packed)

    1  clove garlic, minced

    1/2  teaspoon  ground cumin

    1 2/3  cups  (10 oz.) couscous

    2  tablespoons  minced parsley

    Salt

    Preparation

    1. In a 2 to 3 quart pan over medium-high heat, stir pine nuts until golden, about 2 minutes; remove from pan.

    2. In the same pan, bring the broth, tomatoes, garlic, and cumin to a boil over high heat. Stir in the couscous, cover, remove from heat, and let stand 5 minutes. Add the pine nuts and parsley, and fluff with a fork. If desired, season to taste with salt.

    Read more!

    Wednesday, September 2, 2009

    field trip: Kiwi in Minnesota

    Kiwi in MinnesotaWhile looking at the website of our local paper, I just happened to spot a two-paragraph article about a field tour. The fruit at the center of it all? Kiwi. That’s right. Kiwi in Minnesota.

    Hardy KiwiI traveled about 45 minutes from my home in St. Paul to the Apple House at the University of Minnesota Horticultural Research Center near Victoria, Minnesota. The big, metal building among rolling farmland and new home developments, reminded me of a barn. Instead of hay and horses, however, you can buy plants, gardening guides, fresh vegetables and of course apples.

    Kiwi Tour

    U of M OrchardA group of about 25 of us met outside the Apple House. Our group ranged from people with a general interest in growing kiwi in their backyard to farmers looking for a new crop. We began our trek across the busy highway to the testing orchard. There, they grow different varieties of pears, apples, grapes and now kiwis to see what’s marketable and what can grow in Minnesota’s climate. The discoveries here will help local farmers find new crops to benefit themselves, consumers, and the environment.

    Kiwi TourOur tour guide was U of M's kiwi curator, Bob Guthrie. Pictured above, he’s using a refractometer to test the sweetness of one of the kiwifruits. Guthrie plants and tests kiwi plants at the U-of-M’s orchards and at his home in Roseville, MN. He’s part Bill Nye the Science Guy and your favorite high school science teacher. He has the passion and eagerness to share his knowledge about kiwis, and passed on tips to grow them at home. For example, kiwis need male and female plants to bear fruit. One male plant should help pollinate seven to eight females. We also learned kiwis are easily grown from cuttings. Guthrie even offered a visitor cuttings for free, even though they were ready to pay.

    KiwiJPEG-7Once inside the orchard’s border of fencing and shrubs, we walked to the far edge  and there, alongside grapes, we spotted the first row of kiwis. Now these aren’t the fuzzy kiwi you’d find in the supermarket. These are about the size of large grapes, with green, edible skin and they’re quite a treat. Many of the fruits still attached to the vine were hard. The ripe ones had the feel and give of a grape when slightly pressed between your finger and thumb. As we walked down the row, we were encouraged to give the vines a little shake. If a few kiwis fell off, then they were likely the most ripe and ready to eat.

    Hardy Kiwi FruitPictured above, it looks like a perfect mini kiwi. Each one seemed to have their own flavor. Some were really sweet, others tasted like an apple, and yet others tasted just like mini kiwis. I was surprised to learn, they can be dried like raisins and even made into wine. These are other options for farmers whose kiwis may not be the best looking for fresh-eating. 

    Hardy KiwiThe first rows we toured were the oldest of the test beds and they’re not in a spot that is conducive for growing kiwi. First, they were situated East-West. Apparently the plants are best situated North-South. This will help prevent sun burn on their vines and will allow them to shade themselves from the elements.

    Second, kiwifruit likes part shade. New homes had been built that destroyed the forest and therefore destroyed the kiwifruit’s shade and protection.  To conquer that, their newest system for testing, is a somewhat elaborate, wire pergola.
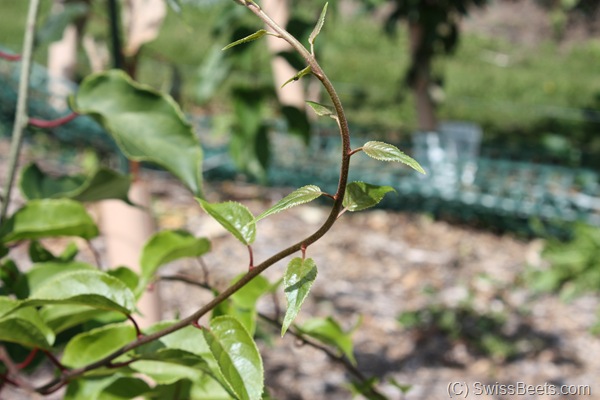
    Hardy Kiwi VineKiwis grow on vines that climb quite vigorously. This pergola system will give the kiwis shade, allow easy harvest and abundant room to spread out and make its own canopy. The pergola is also situated North-South so they’ll be able to test their own suggestions at growing kiwi successfully in colder climates. Most hardy kiwis are able to grow in zones 4-9, but ‘Arctic Beauty’ can grow in zone 3. Researchers recommend a thick layer of woodchips that not only protects the roots at winter, but it also helps keep in moisture during the summer. The result is a much denser and extensive root system, which will help in the growing season.

    Kiwi

    Kiwi Pergola

    Kiwifruit Pergola

    University of Minnesota KiwiThis pergola is so high, that it’ll make harvesting a breeze, as the fruit hang down for picking.Kiwi Pergola System

    Kiwi Pergola U of M

    Arctic Beauty Kiwi The pink-tinged leaf above is from the kiwi called “Arctic Beauty.” In the springtime nearly all the leaves have pink on their tips. This variety can be found in many garden catalogs. It’s hardy to zone 3, hence the ‘Arctic Beauty’ name.

    Silver Vine KiwiPictured above is the kiwi called Silver Vine. This is perhaps the only hardy kiwi that changes color once ripe. It’ll turn a golden color when ready for picking, but it’ll also attract Robins.

    Kiwi CrossThis is one of their hybrid crosses. It’s 3/4 hardy kiwi, and 1/4 fuzzy golden kiwi. You can already see the drastic size difference in leaves as compared to the regular hardy kiwis. I believe this cross has already survived one winter. Since it’s male, they don’t know how big the the fruits will be until they can get a female ready to produce.

    Kiwi VineA tropical expression of foliage that does quite well in negative zero winters.

    KiwiAbove is a kiwi vine that’s being trained along a wire T-bar system similar to grapes. Researchers believe their pergola system is better suited for growing kiwifruit however.
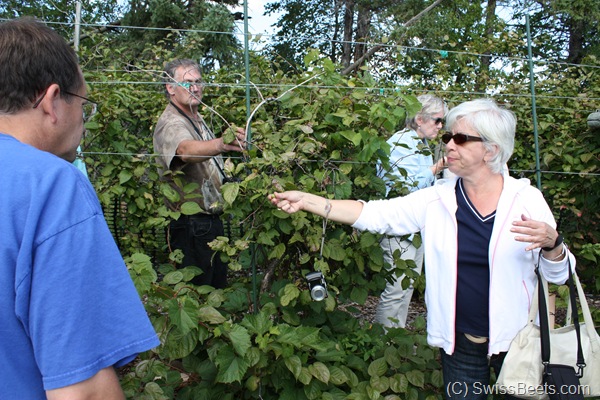
    Tasting Kiwis Everyone was eager to taste these little fruits. You may spot them in the grocery store occasionally, but it sounds like a few more people are ready to grow their own. You may even want to try them in your garden. 

    Read more!

    Tuesday, September 1, 2009

    Fall Garden Update #2

    radish-1 According to the seed packet, I should be harvesting radishes today. But that’s not going to happen. My concerns about the raised bed not getting enough sun, were warranted. I cleaned out a vine that was crawling up a small black walnut tree, and then I tied the tree back with some rope. This will hopefully allow more sun to come through.

    radish-2The radishes were also battered by rain from severe thunderstorms, further pushing down the dirt, leaving the radish root exposed. The result is stringy radishes with big leafy tops.

    Lesson learned.

    Read more!

    Monday, August 31, 2009

    fastfood@home: Fluffy KFC Buttermilk Biscuits

    KFC Biscuit Recipe

    The best part about KFC besides the chicken, is the biscuits with “butter” and “honey spread.” They are light, fluffy and oh so good. I’ve gone through the drive-thru just for an order of four to take home. Of course, I suggest using your own real butter and farmers’ market honey. Better yet, avoid the drive-thru and make them at home instead.

    Buttermilk Biscuit RecipeThis recipe is the best biscuits I’ve ever had. The buttermilk gives the dough that bit of zing. And once they’re cooking, they fluff up, making their own splits across the middle. If you’re tired of biscuits that feel like hockey pucks, try these. And instead of Bisquick, try the homemade Bisquick recipe here.

    KFC Biscuits Recipe

    Printable Version

    Ingredients

    2 tablespoons butter, melted and divided

    2 cups Bisquick baking mix

    2/3 cups buttermilk

    1 teaspoon sugar

    1/4 teaspoon salt

    Directions

    1. Preheat oven to 450 degrees.

    2. Combine the baking mix, buttermilk, sugar, salt, and half of the melted butter in a medium bowl. Mix until well-blended.

    3. Turn dough out onto a floured surface and knead for about 30 seconds, or until dough becomes elastic.

    4. Roll dough to about 3/4 inch thick and punch out biscuits using a 3 inch cutter. Arrange the punched-out dough on an ungreased baking sheet, and bake for 10-12 minutes in 450° F oven, until the biscuits are golden on top and have doubled in height.

    5. Remove the biscuits from the oven and immediately brush each one with a light coating of the remaining melted butter. Serve warm.

    Read more!

    Saturday, August 29, 2009

    Crispy Kale Chips

      Crispy Kale Chips  For years, I just assumed kale was relegated to the world of garnish or added to late fall flower beds for some last minute color. But I assumed wrong. Kale can be so much more. How about a crispy snack alternative to potato chips?

    kale chips

    Months ago I came across a recipe for kale chips. I was intrigued to say the least and best of all it only takes three ingredients; kale, olive oil, and salt. I first imagined they would just go limp and steam themselves in the heat of the oven. But they came out of the oven, crispy, earthy and nutty. I just cooked the whole leaves, minus the stem, but you can also rip the leaves into bite-size sections before cooking.

    You’ll definitely need to watch them as they cook. Some parts of the leaf crisped up faster than others. At which point, I had to break off the crispy parts and continue cooking the limp sections.

    kale chipsKale is one tough leafy green. It can be used in soups because it holds its texture and color instead of getting mushy. Certain varieties have a distinct and strong smell that can turn some people off. While others are pretty mild in their raw form. Best of all, kale is highly nutritious. It’s high in beta carotene, vitamin A, vitamin K, vitamin C, and potassium. And one cup has as little as 36 calories. An insightful breakdown of its nutritional value can be found here.

    Whether you’re on a diet, a vegetarian or just want something healthier than potato chips, kale is your answer. Who knew?

    kale chips
    Printable Version
    Ingredients

    12 large kale leaves, rinsed, dried, and center ribs and stems removed

    Pure olive oil cooking spray

    Salt and pepper to taste

    Directions

    Preheat oven to 250°F.

    1. Hold bottom of kale leaf and with the other hand, strip the leaves off the stem, from bottom to top. Any stem or ribs that come off with the leaves in this process should be tender enough to eat.

    2. Arrange leaves in single layer on 2 large baking sheets. Spray with cooking spray for an even coat. Sprinkle with salt and pepper.

    3. Bake until crisp, anywhere from 10-30 minutes. All the leaves cook differently so check them often and remove the leaves that have turned crispy. Transfer leaves to rack to cool.

    Read more!

    Thursday, August 27, 2009

    Get Rid of Bird Poop

    Jardine's Parrot Birds are messy. And my Jardine’s Parrot, Phoenix, is a prime example. Birds sure do poop a lot. And once dry, it’s like cement.

    She has a perch that suction cups to a window, where I then put down a towel to make sure nothing ends up on the carpet. Everything that lands on the towel then goes to the washer. But even a washer and dryer cycle can’t get rid of bird poop. It’ll turn the it into pellets that are hard as rocks. If that’s not bad enough, wait until you have to clean a bird cage.

    Poop-Off Early on, after getting my bird, I found one product that actually works and it’s called Poop Off. All you have to do is spray the cage where the most poop has accumulated and then start removing and scrubbing it with paper towel. You may not get all of the poop, but many people use a harder scrubber to scrape it away. Once I’m done cleaning the cage, I just let it dry a bit before letting my bird back inside.

    Now Poop-Off really comes in handy if bird poop ends up on the carpet. Instead of water that just soaks and smudges it down into the carpet, this seems to lift it out. I just spray it, dab the paper towel on the spot and it comes out.

    Poop-Off says “Poop-off works best when used with a brush on perches, dried droppings and on carpet. Spray walls, floors, hard surfaces, carpet and cages with liquid. Wipe with a cloth, sponge or brush messes. Repeat if necessary. Poop-Off will remove even the toughest stains from clothing, upholstery and carpets. Check for colorfastness on a small hidden spot before applying to complete area. Used by bird lovers, breeders, Zoos, Veterinarians, bird and pet stores daily to end the tedious task of cleaning up after birds. Guaranteed the finest bird poop remover and laundry pre-spray available. Instantly dissolves bird droppings.”

    Poop-Off’s ingredients include water, active enzymes, surfactant and avian safe fragrance. It seems to be safe on all the fabrics and carpets I’ve tried it on, and it’s non-toxic for birds. It does not contain solvents, orange oil and it’s non-toxic and biodegradable. The smell is unique and fresh, but for the first few minutes you’ll be smelling wet poop and Poop-Off at the same time. But it gets the job done.

    It’s nice to find a product that lives up to its claims, because there’s so much crap out there that doesn’t. Pardon the pun.

    You can find it any pet store like Petco or PetSmart.

    Read more!

    Wednesday, August 26, 2009

    Recipes Now with Printable Versions

    Who really has the luxury of a computer in the kitchen? That’s why all new recipes now have printable versions, without all the banners and pictures. Just click on the “Printable Version” link above the recipe and you won’t have to go back-and-forth, from computer to kitchen!

    printable 

    Technorati Tags: ,
    Read more!

    Tuesday, August 25, 2009

    fastfood@home: Homemade Bisquick

    Homemade Bisquick It’s not exactly fast food but it’s fast, and who hasn’t experienced the world of Bisquick? It’s easy, cheap and you can make about anything with it. When I was growing up, it was a favorite for shortcake and coffeecake. But before you know it, the box had barely enough to finish a recipe. So why not make a homemade version of Bisquick and make it last.

    This recipe will give you about 10 cups, and based on some biscuits I made, it’s far superior than what’s in the yellow box. The biscuits were lighter and fluffier and stayed that away even when they set out all morning. The regular Bisquick recipe usually resulted in biscuits that were hard as rocks by afternoon.

    Since shortening is in this recipe, you’ll want to use an airtight container or Ziploc and store it in the fridge or freezer.

    Printable Version

    Ingredients

    8 c. flour

    1 ¼ c. nonfat dry milk

    ¼ c. sugar

    1 Tbs. salt

    1/3 c. baking powder

    2 c. shortening

    Directions

    1. Combine flour, dry milk, sugar, and salt in a very large bowl.

    2. Cut in shortening until is resembles coarse cornmeal.

    3. Store in tightly closed container or Ziploc in refrigerator or freezer.

    Read more!

    Sunday, August 23, 2009

    midnight snack: Leftover Biscuits with Raspberries & Cream

    Raspberry ShortcakeI don’t like anything to go to waste. So I look for ways to use up leftovers where I can. With that on my mind, I turned some leftover biscuits from breakfast, into a refreshing midnight snack.

    Raspberry ShortcakeThis is a take on raspberry shortcake. Shortcake is basically a biscuit recipe that is usually sweeter and more firm than regular biscuits. But almost any leftover biscuits will work for this recipe, but stick the homemade ones. The biscuits from the tube at the grocery store have a texture and flavor that doesn’t really work for this. I like to let the biscuits sit out after breakfast, and allow them to get hard. It makes it better for the cream and raspberries to soak right in.

    Raspberries & CreamEven the raspberries are leftover from the “Green Tea Cheesecake with Fresh Raspberry Sauce.” I added some more fresh raspberries to the sauce and crushed them slightly. The sauce was sweet enough that I didn’t need to add more sugar. If you’re starting from scratch with raspberries, just crush some of the berries, add sugar to taste and your sauce is done.

    Split your biscuit, and add some of the raspberries to the bottom section. Then top with the other half of the biscuit, and spoon more raspberries on top. Pour some nice, heavy cream over the little biscuit tower you just made. The stale biscuit soaks up the cream and raspberry sauce, turning a bland breakfast item into a super dessert.

    Raspberry ShortcakeYou can also use strawberries, or any berry for that matter. If you prefer you can also whip up some cream instead of pouring it straight from the carton.

    Read more!