Friday, August 21, 2009

A Solution to Cats in the Garden

cats in the garden My new neighbors (actually I’m the new one) love their cats. They have four in fact. But the felines also love newly tilled dirt in my raised beds. I’m not having that.

I first bought Shake-Away. It’s supposed to keep cats away with the smell of fox and coyote urine. So far it’s not working, surprise, surprise. Plus, you can’t put it directly in your garden because it’s toxic to pets and humans. Go figure.

Next, the internet told me cats don’t like citrus. So sure, I thought, I’ll lay out some orange and lemon peels. At first the cats didn’t show up, but it was probably just their day off. A couple days later their was crap in my raised bed again.

The other option was a flour, mustard and cayenne pepper mixture that supposedly will keep the cats away. But there’s also concerns the pepper could burn their eyes and I’m not trying to hurt them, just scare them.

So what do cats hate most? Water.

sprinkler-garden-compost-2744 And that’s where the Scarecrow Motion-Activated Sprinkler comes in. Muuahh. I don’t want cat crap next to my radishes so this is the next logical step. The big box stores were charging upwards of $70 or more and I wasn’t about to pay that much. I found mine for around $50 on eBay.

scarecrow sprinklerIt was easy to set up and put together, and just required a 9-volt battery. It has sensitivity settings so you can dial in what you need. If you’re worried about squirrels and rabbits you’ll want the sensitivity setting high, at about 8 to 9. If you’re worried about deer or herons, a 3 to 4 setting should be just fine. You can also set up how far you want it to spray out. I’m just covering a small space, but it says it can spray at a length of 35 feet, and cover a 45 feet wide area.

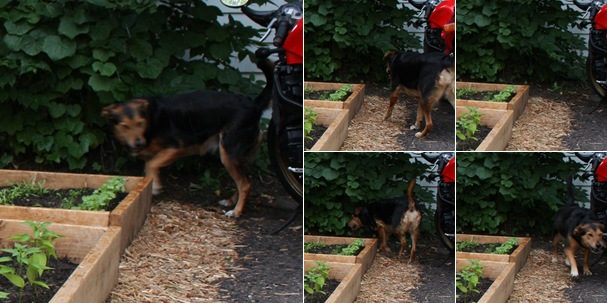
I staked it in the ground, switched on the sensitivity dial and waved my hand in front of it. It let out a quick jet of water and was certainly jarring to scare away any animals. My dog was the first to test it out. She was wondering what was going on every time she went back in the garden area. But once a few drops of water hit her face, she was out of there. Of course, she repeated the process a few times.

scarecrow motion sprinkler Since I have installed it, I’ve heard it go off a couple times, and then spotted the neighbor’s cat nonchalantly walking back to its own yard. But just the other morning I heard the sprinkler start while I was in the kitchen. I looked out the window and didn’t see anything running away. I thought maybe it was the wind blowing the tree that kicked it off. But later I spotted a small hole in the long raised bed, and next to it was a black walnut. Apparently a squirrel was using the flower bed as winter storage but was too scared to finish.

So far, so good. Looks like this sprinkler is set to keep all the pests and their poop out of my garden!

Read more!

Wednesday, August 19, 2009

HOW-TO: Backyard Composting

composting I already have my compost bin going, but here’s some helpful tips if you’re ready to start your own.

These tips list the addition of fertilizer to your compost to provide a nitrogen source. I’m not doing that. Good ol’ manure will work just fine. Manure is my best friend. It once helped me get an 8-foot tomato plant.

Compost Tips

Laws that limit dumping leaves and clippings into public landfills have reawakened public interest in composting.

Composting is a process that allows naturally occurring microbes to convert yard waste, such as leaves and grass clippings, to a useful organic soil amendment or mulch. Gardeners have used compost for centuries to improve the physical condition of soil and to add some of the nutrients needed for plant growth. Incorporating compost into light, sandy soil helps it hold both moisture and nutrients, while adding it to heavy soil improves drainage.

To produce compost efficiently from yard waste several conditions must be met. The micro-organisms responsible for decomposition need oxygen, water, and nitrogen. Particle size also affects efficiency. The smaller the plant pieces, the more rapidly they will break down. Use a shredder or power mower to chop up leaves and small twigs before adding them to the pile.

Composting Structures

To save space, keep your yard looking neat, and speed composting time, plan to contain your compost in some type of structure. Typical dimensions of a compost pile are 5' x 5' x 5'. Simple bin-type structures can be built from woven wire fencing and metal posts. More permanent and elaborate structures can be made from rot-resistant wood, wire, and metal posts.

Locating Your Compost Pile

Locate your compost pile close to where it will be used so it won't interfere with activities in the yard or offend neighbors. The pile will work best where it is somewhat protected from drying winds, yet receives partial sunlight to help heat it.

What Can Be Composted?

Many organic materials can be composted besides grass and leaves: nonwoody shrub trimmings or twigs less than ¼ inch in diameter, faded flowers, weeds, leftover plants at the end of the gardening season, lake plants, straw, coffee grounds, eggshells, fruit and vegetable scraps, shredded newspaper (black and white print), small amounts of wood ash, and sawdust. Sawdust requires the addition of extra nitrogen; wood ash raises compost alkalinity and may result in nitrogen loss from the pile.

There should be little need to compost grass, since clippings may be safely left on the lawn if you mow regularly and remove only 1/3 of the blade length each time. If you do compost grass, mix it with other yard waste. Grass clippings, alone, pack down and restrict airflow which limits the availability of oxygen that is needed for decomposition.

Some things should NOT be composted. Pet feces can transmit diseases. Meat, bones, grease, whole eggs, and dairy products attract rodents and other animals. Badly diseased or insect-infested plants and weeds that are loaded with seed may not heat up enough to be rendered harmless.

Preparing Your Compost Pile

Build your compost pile in layers. Begin with eight to ten inches of leaves, grass, or plant trimmings. Water it to the point of being moist, but not soggy. Then add a nitrogen source, such as ammonium nitrate, ammonium sulfate, or an inexpensive high nitrogen lawn fertilizer without herbicide.

Sprinkle the pile with 1/3 to ½ cup of fertilizer per 25 square feet of surface area (a 5' x 5' bin). If you live in a rural area and have access to livestock manure, you can use a two-inch layer of manure as your nitrogen source.

You may choose to add a one-inch layer of soil or completed compost over the nitrogen to increase the number of decomposing microbes in the pile. However, most leaves and plant scraps have enough micro-organisms to get the job done without the addition of soil or compost.

Repeat these layers until the pile reaches a height of five feet, watering each time you add new layers.

Liming

It is normally not necessary to add lime to your compost pile to improve the breakdown of most yard wastes. Finished compost is usually slightly alkaline. If you add lime during the decomposition process, it will probably be too alkaline when completed. If your pile contains large amounts of acidic materials such as pine needles or fruit wastes, you might add lime, but no more than one cup per 25 cubic feet of material. Excessive lime application can lead to loss of nitrogen from the compost pile.

Maintaining Your Compost Pile

An active compost pile will heat to somewhere between 130 and 160° Fahrenheit. As the center cools, turn the pile to help speed decomposition and minimize any objectionable odors. You will need to do this once or twice a month. Continue to water your compost pile periodically to keep it moist but not soggy. You can add a little fresh material when you turn the pile, but generally, you're better off beginning a new pile.

A well-managed compost pile will be ready in two to four months in the warm season, whereas an untended pile will take a year or more to decompose. When completed, your compost pile will be about half its original height, and will have a pleasant, earthy smell.

From the University of Minnesota Extension.

Deborah L. Brown, Professor
Department of Horticultural Science
Carl J. Rosen, Professor
Department of Soil, Water, and Climate

yft4n5cwr8

Read more!

Monday, August 17, 2009

Green Tea Cheesecake with Fresh Raspberry Sauce

green tea cheesecake with raspberry sauceGreen Tea is everywhere, from soaps to drinks and everything in between. So I thought, why not try it in a cheesecake? I’m not as clever as I think I am. It turns out a lot of people beat me to the punch. There’s tons of recipes out there, but the simplest just requires two teaspoons of green tea added to your favorite base cheesecake recipe.

green tea cheesecake

green tea cheesecake

I didn’t feel like hunting down green tea powder as the recipe calls for, so I just emptied four bags of organic green tea and ground it up in a coffee grinder. It was just enough for two teaspoons.

I know what green tea tastes like, but I wasn’t sure what to expect when I tried my first bite. Surprisingly, it’s subtle, but definitely has that green tea flavor. It’s almost comforting instead of overpowering.

green tea cheesecake with raspberry sauce

But it does need another flavor to accompany it. If you think about all the mixed green tea drinks out there, they have one thing in common and that’s fruit. I decided to use fresh raspberries in a simple syrup to give it something extra. The flavors blend quite well together. There’s nothing like a fresh fruit sauce.

raspberry sauce on cheesecake

You can use your imagination for other fruits to use, perhaps fresh peaches or blackberries would work as well.

Printable Version

Ingredients

4 (8 ounce) packages cream cheese

1 ½ c. white sugar

¾ c. milk

4 eggs

1 c. sour cream

¼ c. all-purpose flour

2 tsp. green tea powder (found in Japanese shops) or 2 teaspoons finely ground organic green tea from about 4 tea bags.

Crust

1 ½ c. graham crack crumbs

¼ c. sugar

4 Tbs. melted butter

Raspberry Sauce

½ c. sugar

½ c. water

6-8 oz. fresh raspberries

Directions

1. Preheat oven to 350° F. Grease a 9-inch spring form pan.

2. In a medium bowl, mix graham cracker crumbs and sugar, then add melted butter and stir until graham cracker crumbs are moistened. Press onto bottom of spring form pan and push slightly up sides of pan, about 1 to 1 1/2 inches. Bake for 5 minutes at 350° F. Once done, let cool.

3. Once the pan is cool, double wrap bottom of spring form pan with wide foil so that water can’t seep into the pan for the water bath later.

4. In a large bowl, mix cream cheese with sugar until smooth. Blend in milk, and then mix in eggs one at a time, mixing just enough to incorporate. Mix in sour cream, flour and green tea powder until smooth. Pour filling into prepared crust.

key lime cheesecake-2871 5. Put spring form pan into a larger rimmed pan, and fill the larger pan with hot water until water is about 1-inch up spring form pan.

6. Bake in preheated oven for 1 hour 10 minutes. Turn the oven off, and let cake cool in oven for an additional 2-4 hours. This help prevent cracking from cooling down too fast.

7. Remove from oven, remove spring form ring, and then let cool to room temperature before chilling in refrigerator.

8. For raspberry sauce, heat sugar and water until boiling and the sugar is dissolved. Add raspberries and heat just until they begin to break up. Remove from heat and cool before refrigerating.

Read more!

Sunday, August 16, 2009

Fall Garden Update

raised fall garden bedTwo weeks on, my hesitancy over a fall garden is over. The lettuce, radish, kohlrabi, swiss chard, carrot, and spinach seedlings seem to be doing great so far.

After a summer of cool weather, the humidity and heat has arrived with temperatures in the 90’s a few times but temperatures are now headed back toward 80.

My fall plantings are made for cooler weather. But back-to-school season is near, and that means chilly mornings are just around the corner. For those that don’t know, I live in St. Paul, Minnesota. And for the most part, we can garden like anyone else. But further North, it’s a lot more challenging where summer temperatures can dip into the 40’s or less. Yikes.

growing lettuce seedlings

Read more!

Saturday, August 15, 2009

Bird Baths on the Cheap

cheap bird bathHow about a bird bath for under ten bucks? Here’s a quick, easy and cheap solution to attract birds without breaking your budget.

Birds don’t seem to be too picky when it comes to bath time. After all they don’t mind muddy puddles. But instead of spending a fortune on stone, or a small fortune on fiberglass, just use a flower pot saucer.

This saucer was just $5.99. Add some water and a stone for the birds to perch on, and you’ve got a nice bath for the birds. I haven’t seen any birds try it out yet, but it’s just a matter of time. It’s placed right next to a bird feeder and it’s going to be about 90-degrees today!

DIY bird bath


bird feeder

I would also recommend replacing the saucer each season to prevent any breakdown of the plastic from getting in the bird’s water. There’s a debate over how dangerous plastic decomposition is to people, at least when it comes to water bottles. So I’d like to look out for our feathered friends as well. Just recycle the old saucer or place it under one of your flower pots. That’s what it was made for :-)

Read more!

Thursday, August 13, 2009

fastfood@home: Egg McMuffin

Homemade Egg McMuffinHere’s my version of the Egg McMuffin. At least in this one I know what’s in the egg squares and I can substitute American cheese with real cheddar. And it’s simple and fast.

First, lay some foil down on a cookie sheet that has sides, and cook your bacon at 350-degrees until crispy. It seems to bring out the best texture and flavor versus frying it on the stove-top.

Second, split your English muffins and put in the toaster. Lightly butter them once done. Also thinly slice some cheddar so it’ll be ready once the egg is done.

Third scramble an egg and put in a small heated frying pan that is well oiled with cooking spray. Roll the pan around to get the egg even throughout. As the egg begins to set up, flip the egg over. Cook until desired doneness and fold in half, and then fold again. You should have four layers of a neat, egg triangle.

Just add your egg, cheese and bacon to the English muffins and you’re done. Faster than trudging to the drive-thru for sure.

McDonalds Egg McMuffin

Read more!

Tuesday, August 11, 2009

New Dew for Diet Drinkers

100975-VIOLETlarge I drink way too much Diet Mtn. Dew. Its fake sweeteners, colors and chemicals have me hooked. But each summer, it seems, only the regular Dew drinkers get crazy new flavors. But finally, we diet drinkers get a new Mtn Dew Flavor you won’t find in regular Dew. And it just launched for a limited time.

“The new beverage, which is a combination of the light citrus flavor of Diet Mountain Dew with mixed berries will be available in stores across the US for 12 weeks beginning August 10, 2009.”

I finally found some at my local Target and the 12-pack cases were on sale. I have to say they’re pretty good. It’s refreshing change from the the Regular Diet Mtn Dew. It’s too bad they’re only for a limited time.

Read more!

Monday, August 10, 2009

Fall Vegetable Gardening

raised garden beds

I’m going full bore now that I’ve moved in a new place that’s letting me garden in the backyard. It’s harvest time for a lot of vegetables but it’s not too late for a fall garden, however, I’ve never done one before.

Luckily the University of Minnesota extension has great information online for planting veggies and dealing with pests in this area. They listed a few veggies that should be planted by August 1st, and I bought some seeds that I’d like to try to see if they make it.

fall gardenssprouting radishes

I planted spinach, white and purple kohlrabi, radishes, lettuce, bright lights swiss chard and even carrots. The carrot packet lists it as a cool season crop, so we’ll see. But after a week everything is already sprouting. My biggest concern is they may not get enough sun.

Around here I try not to let anything go to waste, and I knew these popscicle sticks would come in handy some day. They came with the caramels that I used for the Snickers Fudge recipe. Now they’re garden row labels. :-)

fall garden bed

Read more!

Saturday, August 8, 2009

Composting in the City

GeoBin Composter I’ve wanted to compost for quite a while, but that doesn’t exactly work when you live in an apartment with no where to put it, or use it. But since that has now changed, I’m saving all my vegetable scraps and yard clippings.

I bought a plastic composter called GeoBin from Home Depot. It’s an open-ended bin that you screw to the size you want, stake it in the yard, and start adding leaves and clippings. I had planned on just getting a small role of fencing to do it, but this looks better. The black color will hopefully help it heat up as well.

I had just bought some corn (one with a worm) from the farmers’ market and couldn’t wait to christen the composter with some husks and cobs. Strange I know.

compost-2508

compost-2509

Read more!

Friday, August 7, 2009

Organic Corn With a Surprise

Corn with worms Yep, that’s a worm that didn’t quite escape a pot of boiling water. I didn’t notice it until the corn was done, of course. But I think I’ll take a worm over pesticides.

I bought a dozen ears of corn for six bucks from the St. Paul Farmers’ Market. I first visited the market in June, and now more things are in season. The new arrivals seemed to be cucumbers, carrots, zucchinis, and peppers. I’m looking forward to the melons.

Technorati Tags: ,,
Read more!

Thursday, August 6, 2009

Raised Garden Beds

raised bed-1 I was inspired to do some raised beds after watching this youtube video. If I wasn’t a renter, I’d do something a little more permanent, but this will serve it’s purpose for now.

I used 2x8x10 foot pine lumber to make a 4x4 foot bed and a 4x8 foot bed. I needed the boards cut in half to make 4 foot sections, but I wasn’t going to pay the store a dollar for each cut. The next best thing was to hope they’d fit in the back seat of my car. My backseat windows roll down only half-way. So I used some clothes to cushion the lumber that was now diagonal in my backseat and resting on my window. About three feet of board was sticking out of my window, but the cops I passed didn’t seem to mind. I also bought 3 1/2” deck screws and a small drill bit to pre-drill some holes.  making raised garden beds

I measured and cut the boards with a regular hand saw, and then screwed the boards together with the drill. I will say this design is rather rickety, so be careful when moving them to your garden bed. Now if I owned this property, the wood would be cedar and the bed design would be a little more elaborate, but in the end they all work the same way.

Next spring I hope to add another 4x4 foot bed to the left of the 4x8 bed, where that flower bed is now. Then I’ll have three planting areas for veggies, edible flowers and herbs.

raised beds

Wood chip mulch was on sale at $1.99 a bag. Unfortunately, I had to buy most of my dirt. I found bags of manure/compost at Wal-Mart for $1.34 each, and then found 40-pound bags of topsoil at the hardware store for .99 each. I’d say those are pretty good deals, but nothing is better than free. In the spring, St. Paul has composting sites where you can get compost and dirt for free, but it’s all gone this time of year. So before you buy dirt, check around to see if there’s any free dirt where you live. Or make your own by visiting some local barns. Manure helped my family get 8-foot tomato plants one year.

Raised garden beds

A few things to know:

Don’t use treated lumber for gardens. They can leach toxins into your soil and into what you’re eating.

You never truly know what’s in city soil. So if you’re unsure about your area, raised beds are a good bet to avoid whatever lies underneath. If you want to be really safe, get your soil tested.

If you can afford it, use cedar to make your raised beds. They’ll last longer and look great for far longer than pine.

Read more!

Wednesday, August 5, 2009

Beet Greens

beet greens-2255 Well I didn't throw away my beet greens after making some great farmers' market pickled beets. The greens are just as good, and more earthy than spinach and even swiss chard. Just throw a little bacon in and I love them all.

Here's a simple recipe.


Ingredients
  • 1 pound beet greens
  • 1 strip of thick cut bacon, chopped (or a tablespoon of bacon fat)
  • 1/4 cup chopped onion
  • 1 large garlic clove, minced
  • 3/4 cup of water
  • 1 Tbsp granulated sugar
  • 1/4 teaspoon crushed red pepper flakes
  • 1/6 cup of cider vinegar
Method

1 Wash the greens in a sink filled with cold water. Drain greens and wash a second time. Drain greens and cut away any heavy stems. Cut leaves into bite-sized pieces. Set aside.

2 In a large skillet or 3-qt saucepan, cook bacon until lightly browned on medium heat (or heat 1 Tbs of bacon fat). Add onions, cook over medium heat 5 to 7 minutes, stirring occasionally, until onions soften and start to brown. Stir in garlic. Add water to the hot pan, stirring to loosen any particles from bottom of pan. Stir in sugar and red pepper. Bring mixture to a boil.

3 Add the beet greens, gently toss in the onion mixture so the greens are well coated. Reduce heat to low, cover and simmer for 5-15 minutes until the greens are tender. Stir in vinegar. (For kale or collard greens continue cooking additional 20 to 25 minutes or until desired tenderness.)

Serves 4.

From http://simplyrecipes.com

Technorati Tags: ,,,
Read more!

It’s Been a Busy Month

Well, my blog has been neglected for a few weeks, as I was moving. It was time to move closer to the city to avoid 40+ minutes on the road every day. But it was also certainly time move from a dreary apartment that faces North. That means no sun at winter, so the small apartment feels even smaller.

Luckily I found a nice upper unit in an old Victorian in St. Paul. Now it only take me 8 minutes to get to work. It already feels like a home here, and the landlords are letting me garden in the backyard. I’ve already made some raised beds and planted a fall garden, so I’ll post those up soon.

outside new place-2288

Read more!